Remote Tools
You can download remote access tools from the list below.
What are these tools and what do they do?
All of the tools listed below provide access to support technicians to do the following:
- Remotely access your device to work through related issues and problems.
- Remotely access your device in a screen sharing arrangement so you can collaborate on issues and problems - and to keep you informed of the changes that are being made to resolve issues.
- Monitor the resources on your device including hardware, software for technical troubleshooting purposes in real time.
- Collect logs of hardware and software related information from your device for technical troubleshooting purposes including historic information.
Accessing your device and content.
- In the instance of a remote access session, a technician will ask for your consent to access your device and content "prior" to doing so.
- This is to ensure that you are comfortable with a technician accessing your information including any personal, sensitive or intellectual property that resides on your device.
- If you are not comfortable with consenting to a technician working on your device, then please do not consent - noting that solving some of your technical issues may be limited.
------------------------------------
How to install
- Click on the link below.
- Download to your computer (eg downloads folder)
- Double Click on the file and follow the installation wizard. For mac users, you need to set the right permissions. See below
Windows
Network Monitoring
Mac
Website Access to remote tools
Screen Connect Website
Ninja RMM Website
Instructions for Mac Users
On a Mac, you need to manually set the permissions as per the below.
Screen Connect
Download the agent from the link above.
Once downloaded, double click on the file in your downloads folder and install the application.
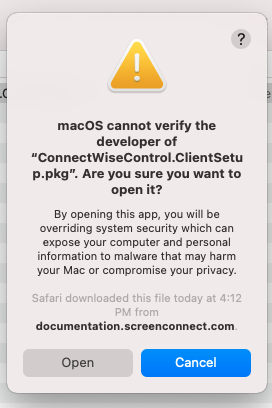
You'll see a prompt notifying that macOS cannot verify the developer of the package. This is because ConnectWise Control is not a Mac application, and the package file is created each time it is built.
To proceed, click Open.
After the application has been installed, you will be presented with the screen below : 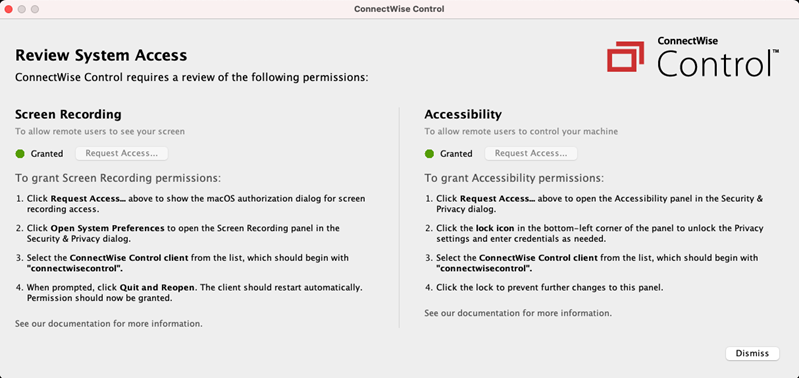
In the Screen Recording section of the large prompt, click Request Access.
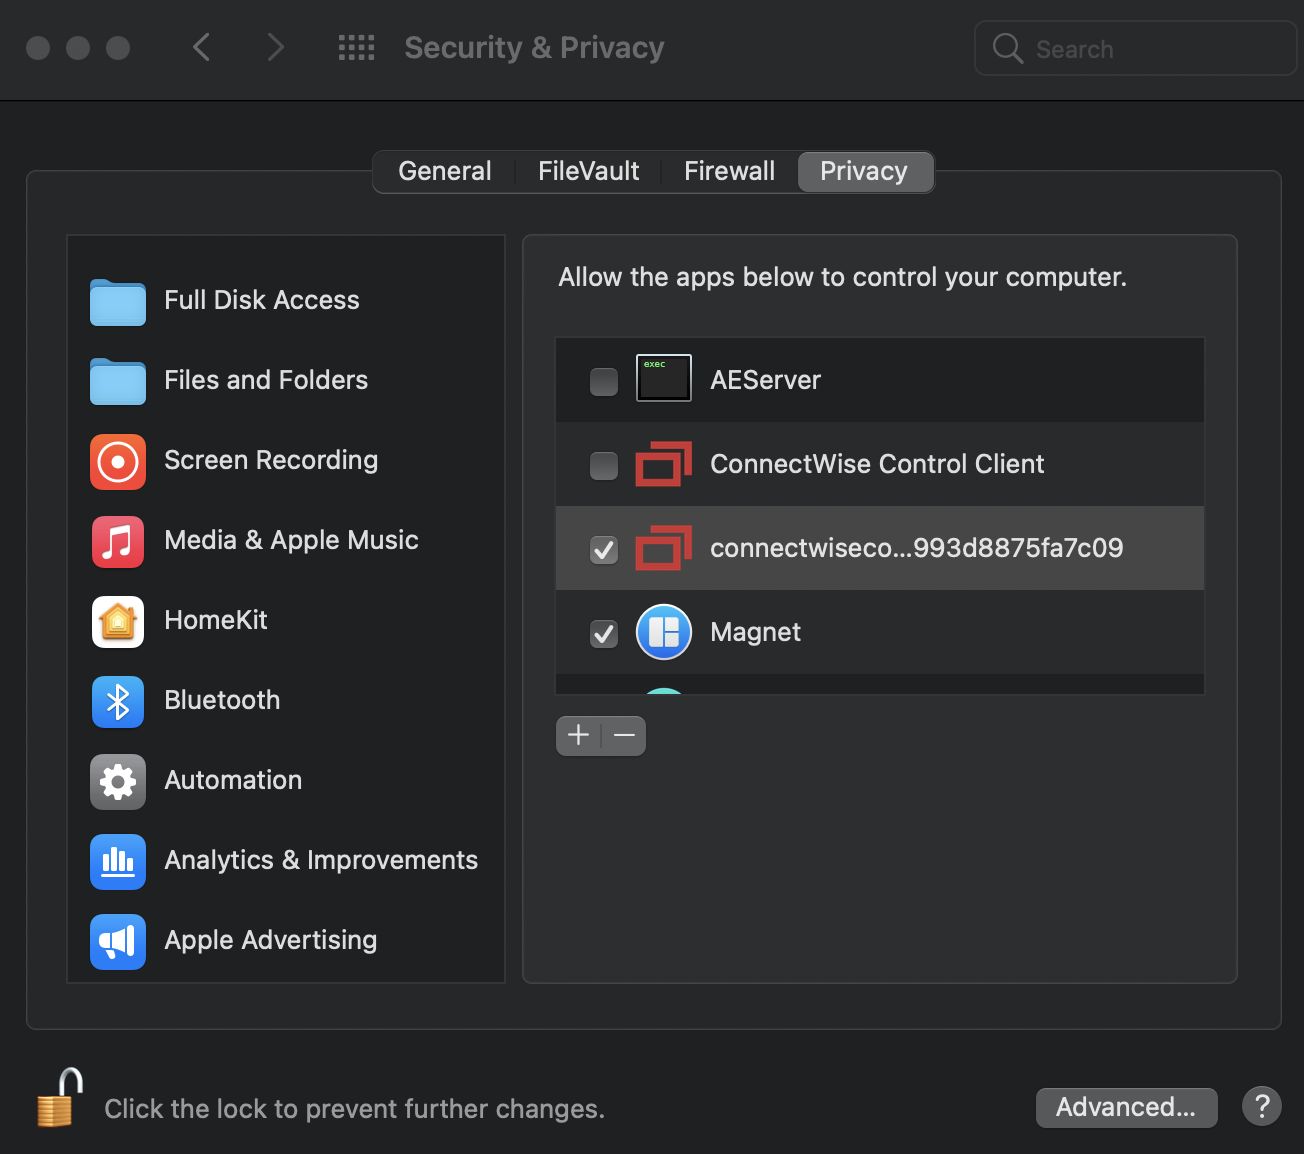
When system preferences opens, click on the pad lock in the bottom left hand corner and unlock the pad lock with your Mac password.
Download the agent from the link above.
Once downloaded, double click on the file in your downloads folder and install the application.
You'll see a prompt notifying that macOS cannot verify the developer of the package. This is because ConnectWise Control is not a Mac application, and the package file is created each time it is built.
To proceed, click Open.
After the application has been installed, you will be presented with the screen below :
In the Screen Recording section of the large prompt, click Request Access.
When system preferences opens, click on the pad lock in the bottom left hand corner and unlock the pad lock with your Mac password.Screen Recording
- Select the ConnectWise Control client. The name will begin with "connectwisecontrol".
- You'll see another window with the option Quit Now. Click Quick Now and the client will automatically restart.

- Select the ConnectWise Control client. The name will begin with "connectwisecontrol".
- You'll see another window with the option Quit Now. Click Quick Now and the client will automatically restart.
Allow accessibility access
- Return to the large Review System Access window. In the Accessibility section of the window, click Request Access.
- Navigate to the Accessibility window
- Next, select the ConnectWise Control client. The name will also begin with "connectwisecontrol".
- You'll see another window with the option Quit Now. Click Quick Now and the client will automatically restart.
Done
Related Articles
Setup Office 365 account on Android email app
Setup Office 365 account on Android email app Before you begin, update the Gmail app to the latest version: Open the Google Play Store app on your phone or tablet. Type "Gmail" into the search bar and then select Update. Note: If the update option is ...